Search for a UVM tutorial and you will find hundreds of them, most starting with a class diagram that looks like a family tree. It is easy to feel lost before writing a single line of code. The problem is rarely the learner; it is the order in which the topics are presented.
This SystemVerilog learning roadmap takes a different approach. Each stage builds on the previous one, so that when you reach UVM, nothing feels mysterious. Think of it as a practical UVM tutorial for beginners that begins well before UVM.
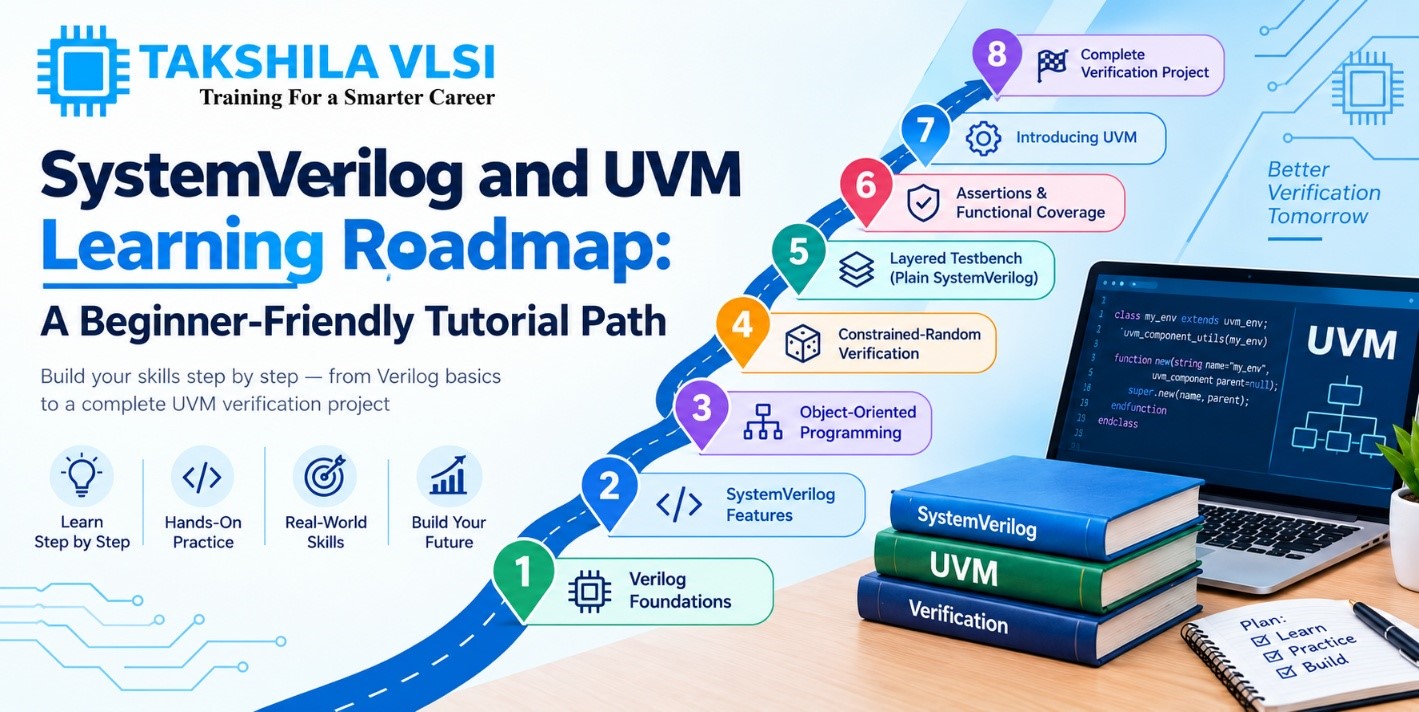
Stage 1: Solid Verilog Foundations
SystemVerilog is an extension of Verilog, so the basics carry over. Make sure you are comfortable with:
- Modules, ports and hierarchy
- Wires versus regs, and blocking versus non-blocking assignments
- Always blocks and how they describe combinational and sequential logic
- Basic testbench structure: clocks, resets and initial blocks
- Waveform viewing to confirm behaviour
Practice goal: write and simulate a counter, a shift register and a simple FSM with a basic testbench.
Stage 2: Core SystemVerilog Features
Now move to the language features that make verification practical.
- Data types: logic, bit, int, enums, structs and typedefs
- Arrays and collections: dynamic arrays, queues and associative arrays
- Tasks and functions: automatic variables, pass by reference, return values
- Interfaces and modports: bundling signals and avoiding port-connection mistakes
- Clocking blocks: avoiding race conditions between the testbench and the design
Practice goal: rebuild your earlier testbench using an interface and a clocking block, and store results in a queue for comparison.
Stage 3: Object-Oriented Programming
This is the stage where many learners slow down, and it is also the stage that matters most for UVM. Take your time.
- Classes, objects and handles, and the difference between a handle and an object
- Constructors, properties and methods
- Inheritance, the extends keyword and the super keyword
- Polymorphism and virtual methods
- Parameterized classes and static members
Here is a good test of understanding: can you explain why a base-class handle can point to a derived-class object, and what happens when you call a virtual method through it? If yes, you are ready for UVM.
Practice goal: create a transaction class, extend it into two specialised variants and show polymorphism at work.
Stage 4: Constrained-Random Verification
Directed tests check what you thought of. Random tests find what you did not. SystemVerilog lets you randomize class properties under constraints so that stimulus is varied but still legal.
- rand and randc variables
- Constraint blocks, implication and distribution
- Inline constraints with randomize() with
- pre_randomize and post_randomize
- Controlling constraints dynamically with constraint_mode
Practice goal: generate random bus transactions that respect protocol rules, such as valid address ranges and burst lengths.
Stage 5: A Layered Testbench in Plain SystemVerilog
Before UVM, build a layered testbench yourself with a generator, driver, monitor and scoreboard, communicating through mailboxes. This teaches the reasoning behind a verification architecture. When you later see UVM components, you will recognise them as standardised versions of what you already built.
Stage 6: Assertions and Functional Coverage
Add SystemVerilog Assertions to check protocol behaviour over time, and covergroups to measure how much of the design behaviour you exercised. Even a short covergroup with a few crosses teaches you to think about verification completeness.
Stage 7: Introducing UVM
Now you are ready. Learn UVM in this order, and each piece will connect to something you already know.
| UVM concept | What it does | You already know it as |
| uvm_sequence_item | Holds one transaction | Your transaction class |
| uvm_driver | Drives pins from transactions | Your driver |
| uvm_monitor | Observes pins and rebuilds transactions | Your monitor |
| uvm_scoreboard | Compares actual and expected results | Your scoreboard |
| uvm_agent | Groups driver, monitor and sequencer | A tidy wrapper |
| uvm_env and uvm_test | Assemble components and select scenarios | Your top-level testbench |
Sequences and the Sequencer
Sequences generate the stream of transactions. The sequencer arbitrates between sequences and passes items to the driver. Learn the handshake between them, including start_item, finish_item and get_next_item, since it is a frequent interview topic.
Phases, Factory and Configuration
UVM runs through phases such as build, connect, run and report. Understand what belongs in each. Then learn the factory, which lets you override components without editing code, and the configuration database, which passes settings and virtual interfaces down the hierarchy.
TLM Communication
Analysis ports and exports carry transactions from monitors to scoreboards and coverage collectors. Learn how a single monitor can feed several subscribers without knowing who they are.
Stage 8: A Complete Verification Project
Put everything into one end-to-end project. A good option is verifying an APB or SPI peripheral:
- Write a short verification plan listing features and scenarios.
- Build the UVM environment with agent, scoreboard and coverage.
- Create base and directed sequences, then constrained-random ones.
- Add assertions for protocol rules.
- Run regressions with multiple seeds.
- Review coverage, fix holes and write a summary of what you found.
Plant a few bugs deliberately in the design and confirm that your environment catches them. This is the best way to prove your testbench works.
Study Tips That Actually Help
- Type the code yourself. Copying and pasting teaches almost nothing.
- Read the UVM source code for classes you use often. It is more readable than people expect.
- Keep a personal notebook of errors you hit and how you solved them.
- Explain each concept to someone else. If you cannot, you have not learned it yet.
Where to Practice
Commercial simulators from Synopsys, Cadence and Siemens are standard in industry. For home practice, browser-based simulators and open-source tools can cover most of the SystemVerilog fundamentals, although full UVM support varies. A structured course with lab access removes this setup problem.
Keep Going
Following this order, SystemVerilog and UVM become manageable skills instead of an intimidating wall of jargon. Move stage by stage, finish each practice goal and do not skip the OOP stage.
For mentor-led practice and project work, explore the verification training at Takshila Institute of VLSI Technologies.